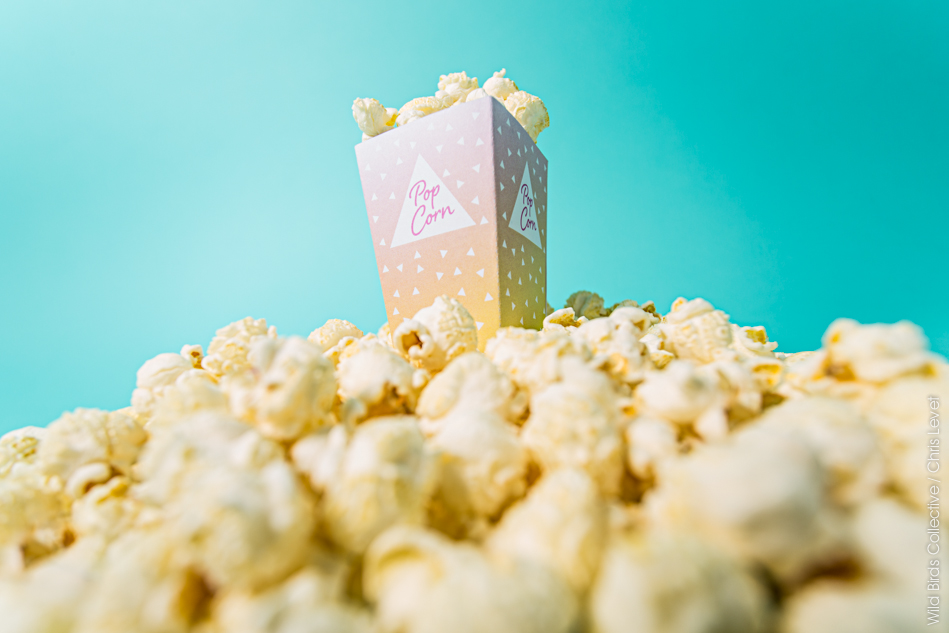
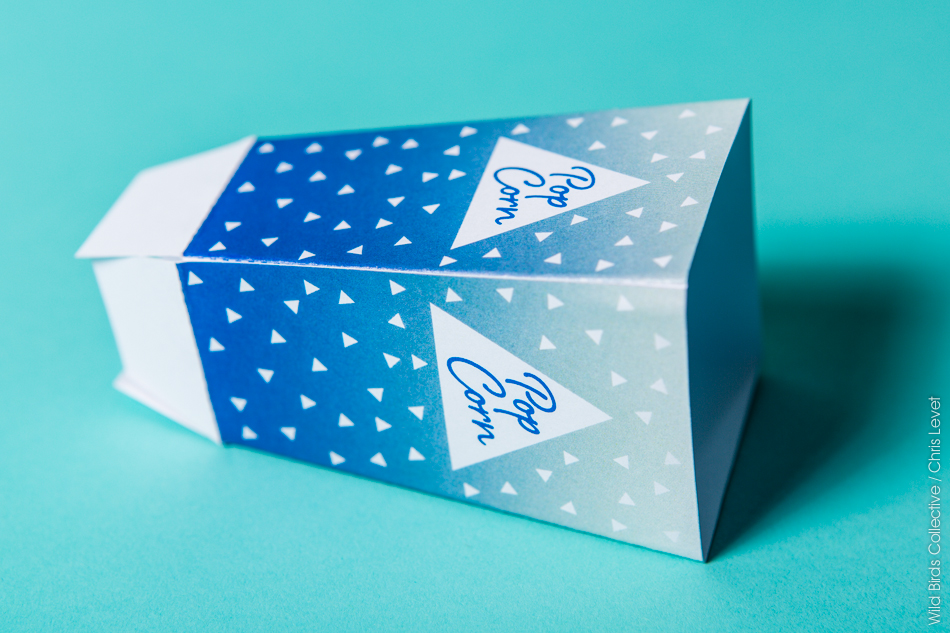
Un petit bout de temps que l’on ne vous avait pas proposé un nouveau DIY. Mais rassurez-vous, plusieurs tutoriels déco sont en préparation ! Pour l’heure, voici comme promis, un diy pour réaliser des mini boîtes de popcorn en papier. Lors du vernissage de l’expo photo « American Roads » de Christophe, nous avions fabriqué des mini popcorn box à l’effigie de l’évènement.
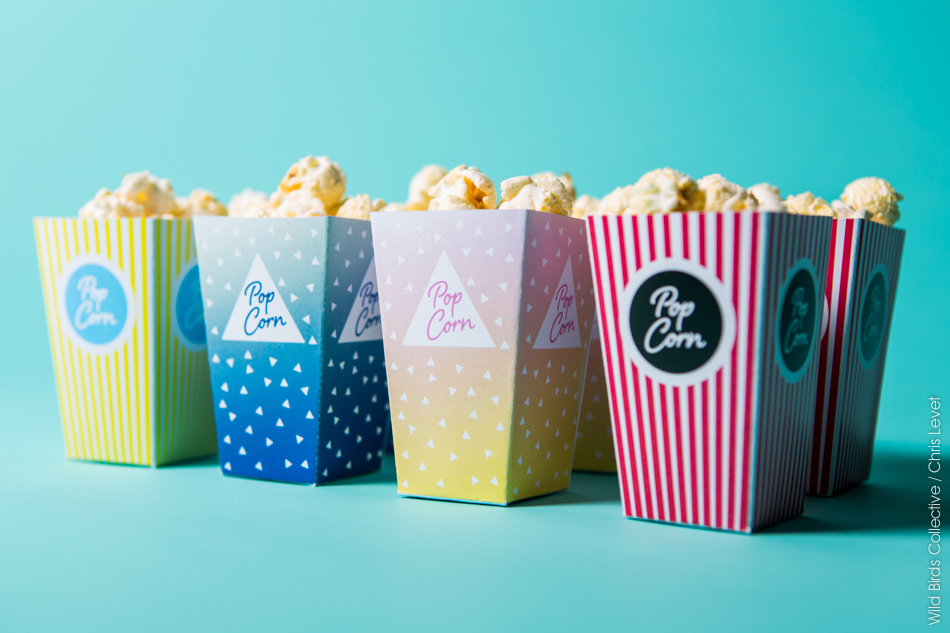
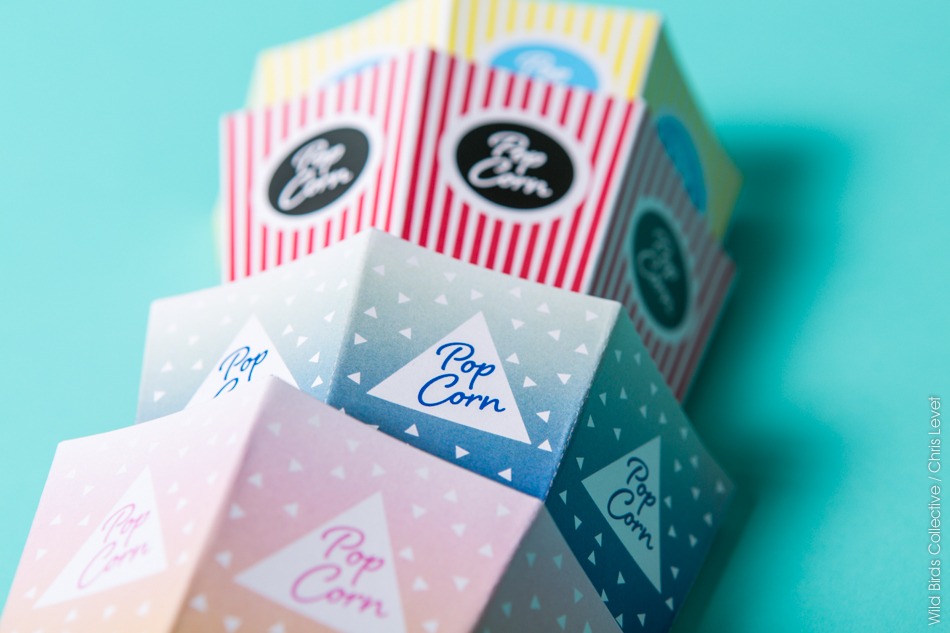
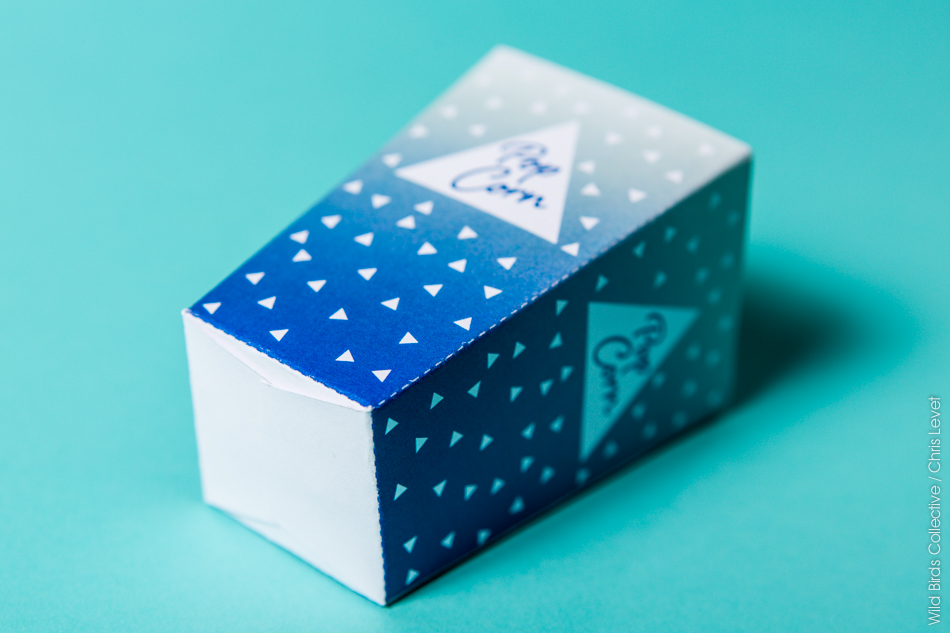
Pour vous, on a créé un nouveau design et de nouvelles couleurs pour encore plus de pop’s ! Un modèle de boîte à popcorn classique, rayé rouge et blanc ou jaune et blanc. Et un modèle tie and dye, effet coucher de soleil ou nuit étoilée, dans un style Coachella ! C’est parti !
Pour réaliser ce diy, il vous faut :
- Du papier cartonné blanc (250 gr.) au format A4
- Une imprimante (vous pouvez aussi choisir de faire imprimer les motifs)
- Des ciseaux
- De la colle blanche (type vernis-colle ou autre)
- Un petit pinceau
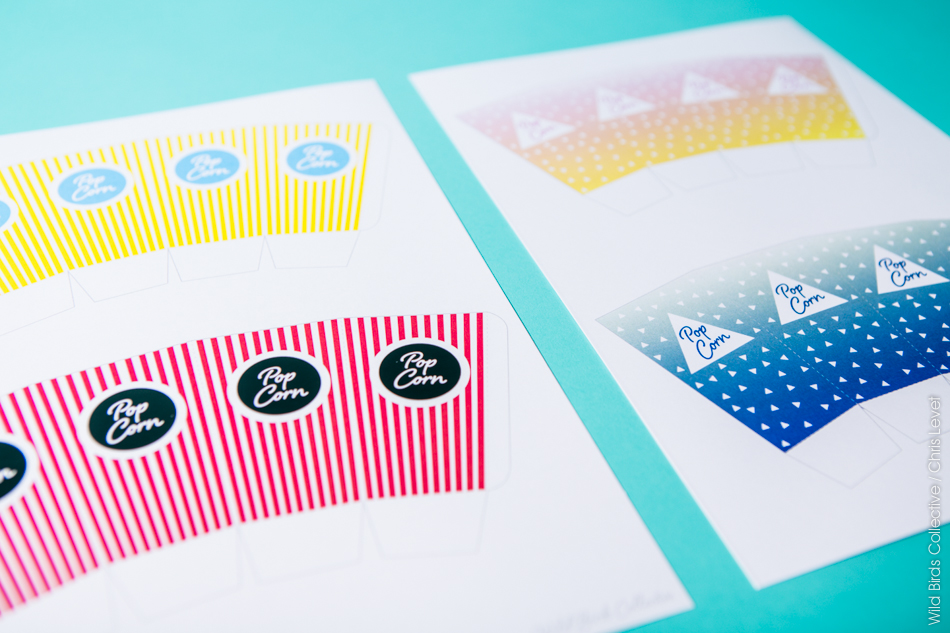
Commencez par télécharger les patrons des boîtes de popcorn en fichiers pdf : Popcorn Stripes – Popcorn Tie & Dye
Si vous avez une imprimante, imprimez vos feuilles. Attention à l’épaisseur du papier ! Sinon, faites imprimer les motifs.
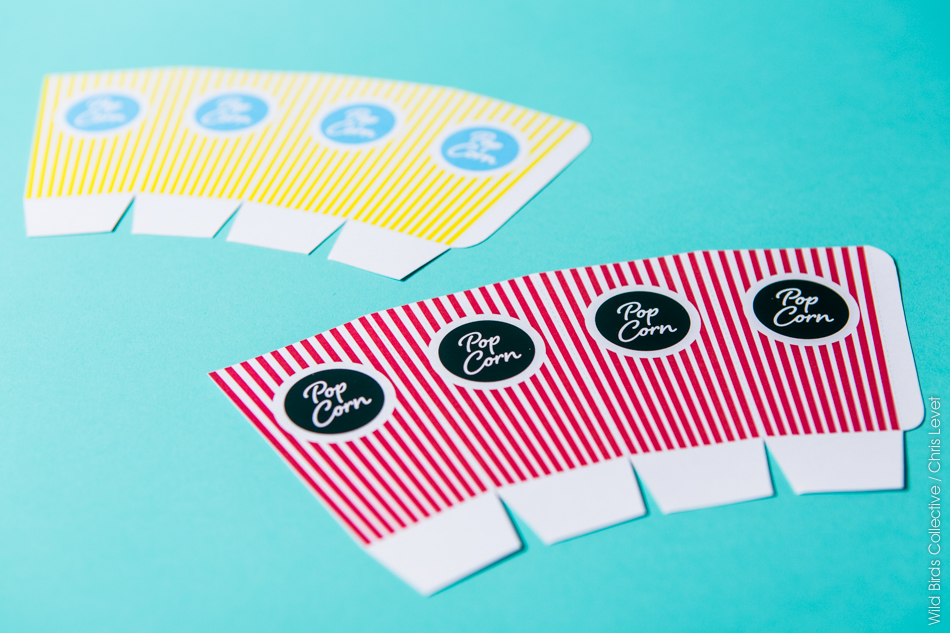
Munissez-vous de vos ciseaux et découpez les patrons de chaque boîte.
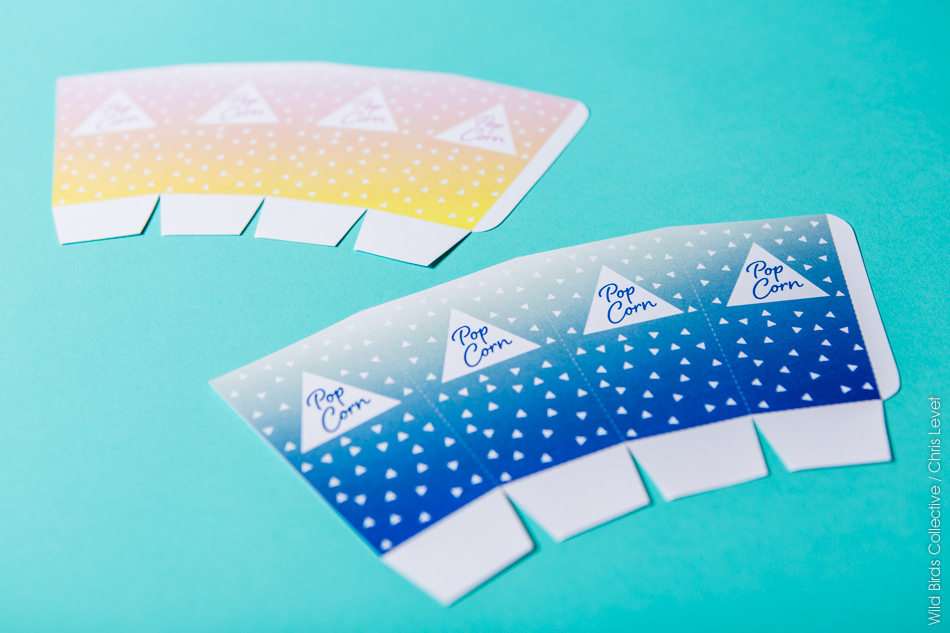
En suivant bien les lignes grises continues.
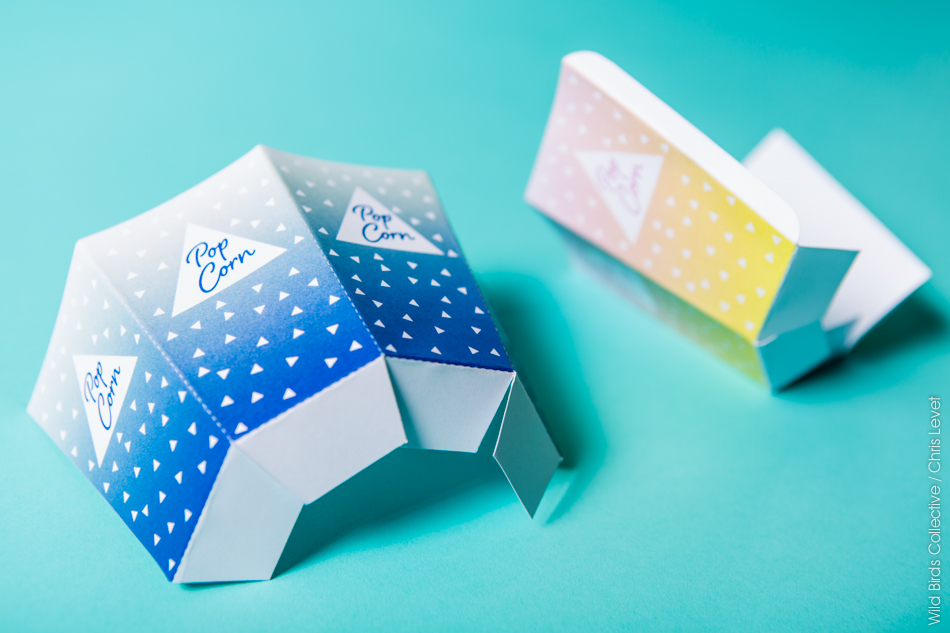
Puis, pliez les boîtes sur l’endroit, pour leur donner leur forme, en suivant les lignes grises en pointillés. N’oubliez pas de plier les rabats du dessous et celui du côté.
Si vous souhaitez réaliser plusieurs boîtes, je vous conseille de travailler à la chaîne, étape par étape, pour plus d’efficacité ! Pour le vernissage, j’avais réalisé plus d’une centaine de boîtes de pop-corn ! Autant vous dire qu’il ne fallait pas perdre de temps !
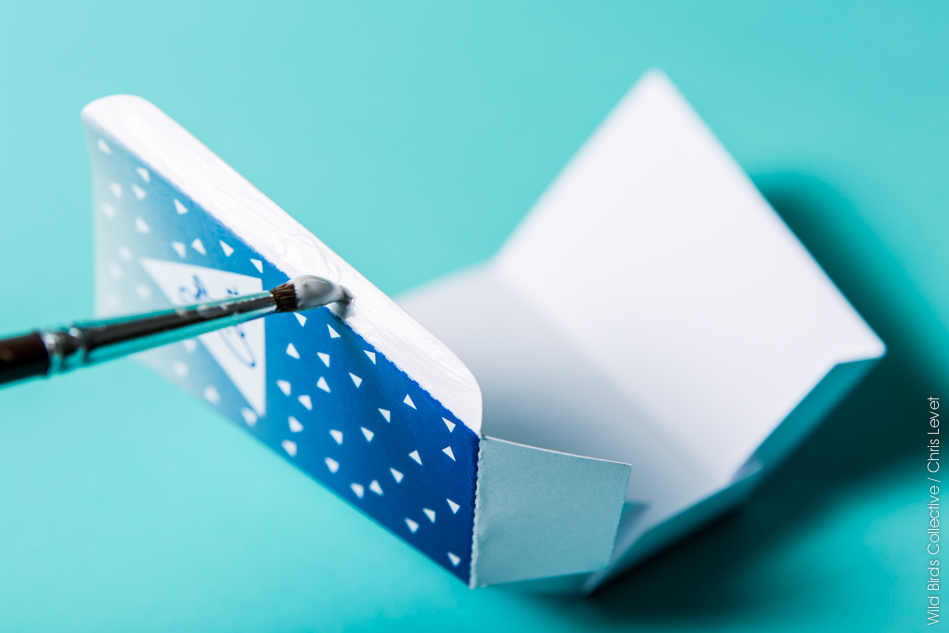
Une fois que les boîtes sont pré-pliées, encollez le rabat vertical à l’aide d’un petit pinceau. J’ai choisi une colle blanche vinylique (vernis-colle) car elle est transparente au séchage. Mais vous pouvez utiliser d’autres colles à papier. Attention, ces colles ne sont pas alimentaires !
Ensuite, collez ensemble le rabat vertical et la partie opposée pour fermer la boîte.
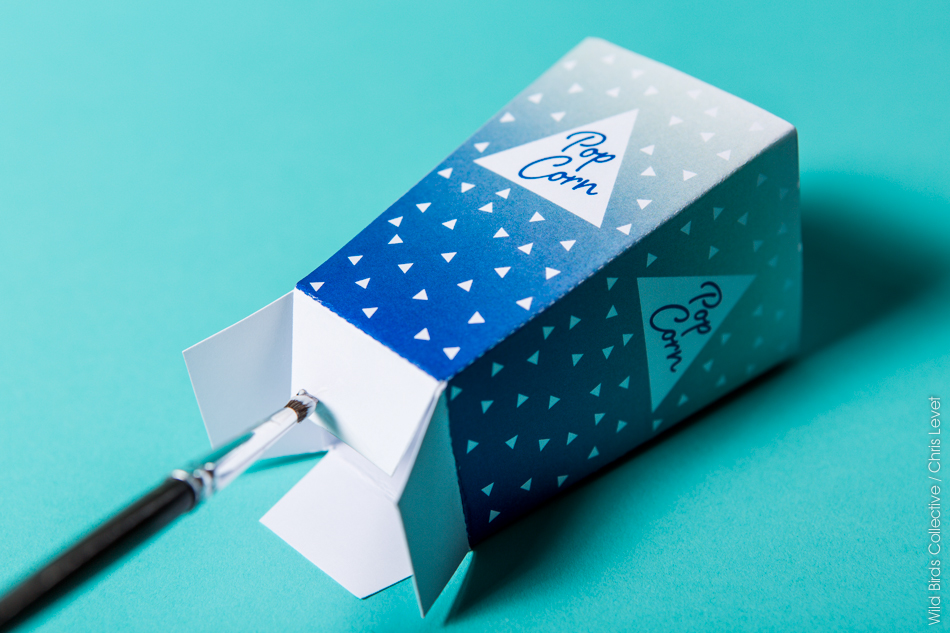
Encollez l’extrémité d’un rabat inférieur sur la face externe.
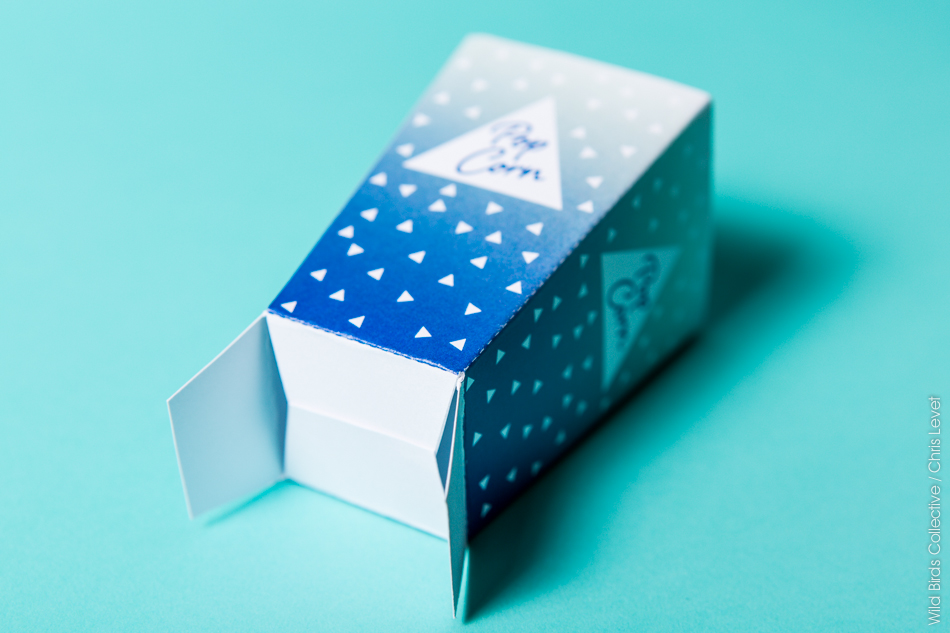
Rabattez le côté opposé.
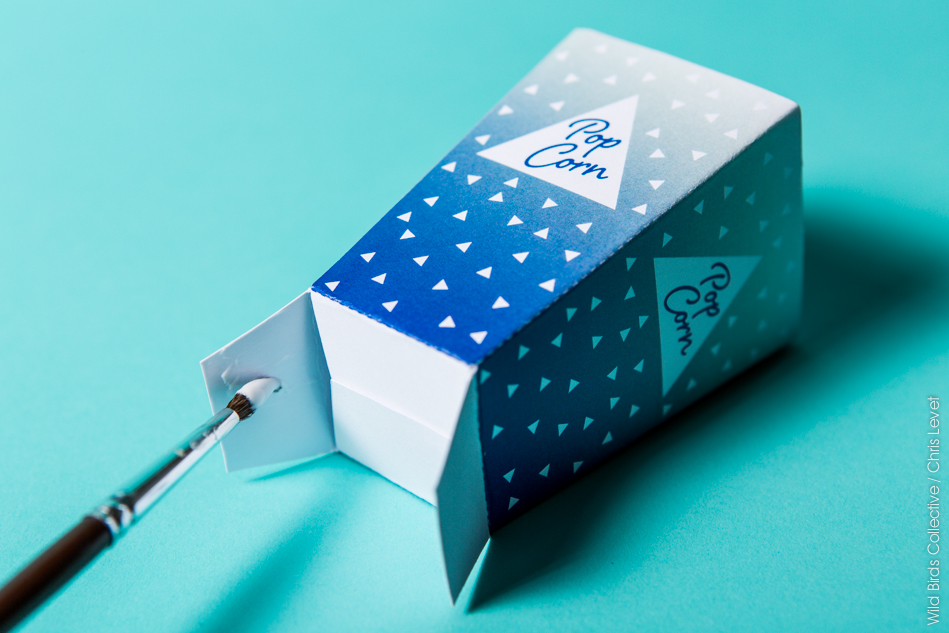
Encollez alors les faces internes des deux autres rabats.
Rabattez pour fermer le fond de la boîte. Une fois positionnée à la verticale, vous pouvez vous aider du manche du pinceau pour appuyer légèrement au fond de la boîte quelques instants afin d’assurer le maintien du collage des rabats.
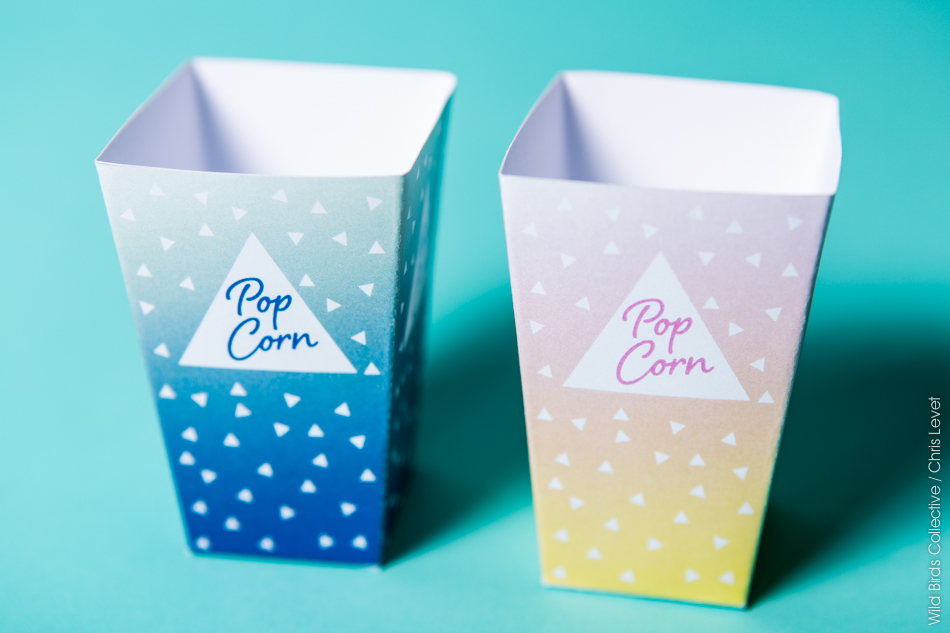
Et voilà, vos mini popcorn box sont prêtes !
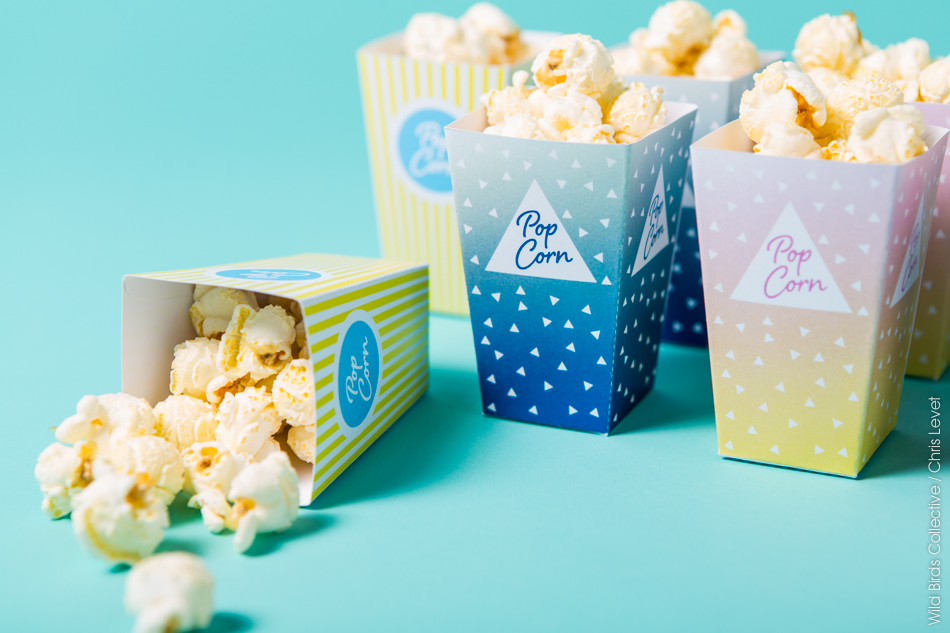
Vous n’avez plus qu’à les remplir de popcorn ! Attention tout de même aux encres, au papier et à la colle ! Si ils ne sont pas alimentaires, prévoyez de placer du papier sulfurisé dans chaque boîte pour éviter que la nourriture soit en contact direct avec d’éventuels produits chimiques ! En plus, cela protègera le papier des tâches de gras.
Bon ben évidement, il n’en reste plus une miette ! Bon appétit !
Pour découvrir nos autres tutoriels : DIY
Photos © Christophe Levet
English version: Here’s a diy for make mini paper boxes of popcorn with four patterns to download free. A model of classic popcorn box, striped red and white or yellow and white. And a tie-dye pattern in two colors! Let’s go!
To make this DIY, you need:
- White cardstock (250 gr.) in A4
- A printer
- Scissors
- Glue for paper
- A small brush
The steps:
- First download the patterns of the popcorn boxes in pdf files: Popcorn Stripes – Popcorn Tie & Dye
- Print the patterns on white cardstock. If you print the patterns with your own printer, be careful with the thickness of paper!
- Cut out the patterns of each box, with scissors, following the continuous gray lines.
- Fold the boxes on the outside face of the paper, following the gray dotted lines, to give them their shape. Don’t forget to fold the flaps of the bottom and the flap of the side.
- Once the boxes are pre-folded, paste the vertical flap using a small brush. Glue together the vertical flap and the opposite side to close the box.
- Paste the lower end of a flap on its outside face. Fold the opposite side.
- Paste the inside faces of the other two flaps. Fold to close the bottom of the box. Once positioned vertically, you can help you with the brush handle for gently press the bottom of the box a few moments to maintain the gluing of flaps.
- And voila, your mini boxes of popcorn are ready! You just have to fill them with popcorn!
Be careful to the inks, the paper and the glue! If they aren’t food products, place parchment paper in each box. It prevents that the food touches directly the chemicals! In addition, it will protect the paper of fat stains.
If you want to make several boxes, I advise you to work assembly-line, step by step, for more efficiency! For our photo exhibition opening, I had made more than a hundred boxes of popcorn! By doing like that I won a lot of precious time!
To discover our other tutorials: DIY
Photos © Christophe Levet

octobre 23, 2014, 9:57
Oh elles sont trop chouettes ces box ! J’aime !
Des bises
Coline
http://bienvenuechezcoline.com
octobre 23, 2014, 7:24
Merci Coline! 😉
octobre 24, 2014, 11:13
Je retiens ce DIY!
octobre 27, 2014, 10:01
Merci Laura, ravie qu’il te plaise! Bon lundi! 😉
janvier 28, 2015, 11:35
Génial ! en plus, j’adore le popcorn hihi
Kaya
janvier 29, 2015, 11:21
Merci ! 😉
avril 30, 2016, 11:48
J’ai adoré découvrir ton DIY, je l’ai sélectionné pour mon calendrier DIY du mois d’avril ! Je te laisse le lien : http://www.cahierbleu.fr/calendrier-2016/
mai 4, 2016, 3:21
Oh, super !!! <3 Merci beaucoup ! Ravie qu'il te plaise ! 😉